Working with robot classes
Projects in BlueJ
Students will typically create a new project for every unit or project with every Java class representing a robot program or variant thereof. The menu command Project → New Project… opens a dialog to select a directory and to specify a project name in the field Folder Name. BlueJ will add a new subfolder with the project name and some contained files to the selected directory.

Creating a robot class
When creating a new robot class, BlueJ generates a Java file from the selected class template. In the project view the new class will be represented by a rectangular icon labeled with the class name. For creating a new class, one has to proceed as follows:
- Click the button New Class… in the project view.
- Enter a valid class name. Only use plain letters (without accent, umlaut, ...) and digits. Deviating class names that might work in robot simulations will fail for sure on NXT robots. Choose the right class template from the option fields. BlueJ will add the corresponding default coding to the new class. In the example below a new class Robby will be created from the template Robot. This template has been designed for beginners, whereas more experienced students will probably prefer the template Robot2 which requires real knowledge on object-oriented programming.

Editing and compiling robot classes
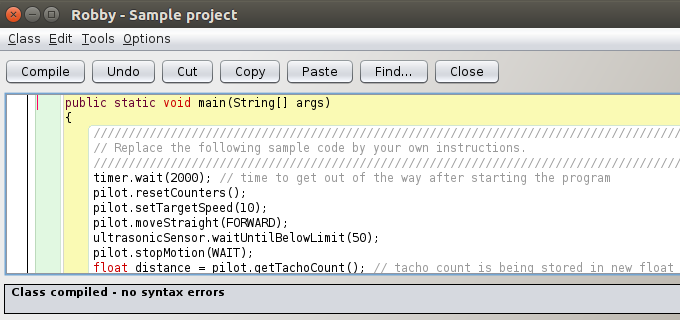
For editing a class you perform a right-click on the class icon and select the menu item Open Editor. The BlueJ editor will display the coding with colored shadings according to the structure of the class (see figure right at the top). Changes to the coding will be saved with the menu command Class → Save or with the shortcut Ctrl S. BlueJ will automatically save any changes when closing the editor or compiling the class.
New robot classes will contain a small sample implementation. Before replacing this coding with own instructions, the complete workflow should be tested once. Also, it could be a first exercise to look at the sample coding in order to predict the behavior of the robot without studying the interface documentation.
To start the compilation, press the Compile button in the editor. Status messages of the compiler will be printed in the footer of the editor window. In case of a syntax error, an error message will be displayed in the footer and the cursor will jump to the corresponding position in the coding. Otherwise, the message "Class compiled - no syntax errors" will show up. The class can also be compiled from the project view. Right-click on the class icon and select the context menu item Compile. In case of a compilation error, the editor will be opened for displaying the error in the described way. After a class has been freshly generated from a template there should not be any compilation errors.
Starting robot programs in the simulation tool
To simulate a robot program, right-click on the robot class icon and select the context menu item Robot → Simulate. The simulation tool will be opened. More detailed information on the simulation tool can be found on dedicated pages. For a first test it is sufficient to adjust the robot position and orientation within the simulation scenery by drag&drop and to start the simulation run with a click on the Start button. In case of the robot program based on the template Robot you have to follow the instructions on the robot display (on the bottom right in the simulation tool) to complete the simulation run. The termination of the simulation run will be indicated by an acoustic signal.


