Customizing BlueJ
Apart from the general customization of BlueJ there is the need for additional adaptions regarding the Jabotics integration. Here the possibilities for customizing the help menu and the class templates as well as for validating the Jabotics installation will be described. Missing or grayed out menu items point to an incomplete or faulty installation or configuration.
Settings in bluej.defs
Basic settings for BlueJ (like language selection) and additions to the help menu need to be defined in the text file bluej.defs. The file contains many helpful comments and examples. Furthermore there is a sample configuration file provided by Jabotics that adds the help menu entries for opening the HTML documentation of the Jabotics interfaces. See the pages on the installation of Jabotics to get hints where to find the mentioned files for different operating systems. The file bluej.defs can be worked on manually in a text editor or completely replaced by the sample configuration file. In any case it is a good idea to make a backup of the original file.
Class templates
New class templates can easily be created by copying and modifying existing ones. It is not mandatory to add new templates to the list of templates in the file bluej.defs. In general it is sufficient to place the template files in the appropriate BlueJ folder which depends on the language settings. If English has been chosen as the interface language, corresponding class templates need to be placed in the subdirectory lib/english/templates/newclass of the BlueJ installation directory. The English default templates provided by Jabotics can be found in the subdirectory templates/en of the Jabotics installation directory. On some systems the Jabotics templates need to be copied manually to the appropriate BlueJ directories (see installation instructions).
Validating the Jabotics integration
When following the installation instructions carefully, all elements of the Jabotics integration should be available in BlueJ. Since manual work is required on some systems, mistakes cannot be ruled out, though. It should be checked first, if the Jabotics extension has been recognized and started by BlueJ. Open the Tools menu in the project view. If no menu item Robot is visible, the Jabotics extension has not been started. Check if there is a file (or corresponding symbolic link) jabotics-bluej.jar in the subdirectory lib/extensions (or simply extensions) of the BlueJ installation directory. If it is missing, copy the corresponding file from the subdirectory lib of the Jabotics installation directory and restart BlueJ.
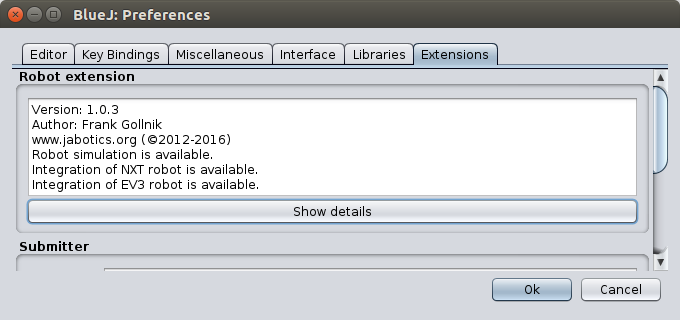
If the Jabotics extension has been recognized by BlueJ, but some menu items are grayed out that should not be deactivated, it might be helpful to look at the initialization messages. Open the preferences dialog by selecting Tools → Preferences... and switch to the Extensions tab which contains a section Robot extension (as shown in the figure above). Here you can check, which modules have been initialized successfully. If one of the modules (robot simulation / NXT integration / EV3 integration) unexpectedly is not available, you can click on the Show details button to get further information. The following figure shows the resulting output for a Linux system where all initializations have been successful.

Here, all necessary files, directories and JDKs have been found at standard locations. In case of error messages it should be checked if the corresponding components have been installed at all (like leJOS libraries). On some systems it might be necessary to define some of the listed environment variables to make all components available. Details depend on the operating system. On Linux systems, environment variables can be set within the BlueJ start script.
")
")